Thursday, June 30, 2011

New winner...

Since I didn't hear from the winner of the Fat Quarter Bundle, I went ahead and drew a new name.  Congratulations Shannon!  Again you have 5 days to email me with your address so I can get them in the mail to you.

Although my posting has slowed down a little lately, I'm still plodding along here.  In fact, I managed to finish painting the kitchen ceiling today.  Whew!  I'm SO glad to be done with that task.  Only a couple more painting jobs and I can take a break.  I'm also working on several quilts right now and hope to have another top completed in the next day or two.  I'll share pictures once I hit that point.

Until then, here's a picture of my parent's cat, Cricket.  She sat in this same pose for the longest time, although I think she looks uncomfortable.  Cats are strange creatures...

Cricket in her box
Until later...

May the words of my mouth and the meditation of my heart be pleasing to you, O Lord, my rock and my redeemer... 
Psalm 19:14 (NLT)

Wednesday, June 29, 2011

Unclaimed prize?

This is just a last minute reminder to Catswhiskers to contact me about the FQ Bundle she won.  But if I haven't heard from her by midnight, I'll draw another name.  So check back in the morning 'cause it might be you! 

I caught my little daredevil on top of the kitchen cabinets again.  For a cat who weighs as much as he does, he sure can jump!

David on top of the cabinets
You can see that I still haven't finished repainting the ceiling here...  I've been meaning to get to that.

Until later...

Every word of God is flawless; he is a shield to those who take refuge in him.  
Proverbs 30:5 (NIV)

Monday, June 27, 2011

Star Bright (using foil)...

I finished another small quilt this past week.  But as it was a gift for someone, I couldn't share pictures until after she'd received it (which she has).  This was another project for the group I'm in called The Twelve of Us.  The gist of it is that every couple of months someone chooses a new technique/theme and we make each other something with it.  I have to say this one has been the most challenging (so far).  The challenge was "to make a project using fabric foils from Laura Murray designs".

I'll admit I've never done anything like this and had no idea where to start.  I perused Laura Murray's website and ordered supplies and then scratched my head.  She has some beautiful pieces as examples, but I couldn't just copy one of hers.  That would defeat the whole purpose of trying something new, wouldn't it?  Without knowing what the end project would be, I decided to just try foiling some fabric.  If any of it turned out, I'd figure out something to make with it. 

Step 1 of foiling involves applying some type of adhesive to your fabric.  I used the glue that she sells on her website and some rubber stamps I bought from JoAnn's.  I brushed the glue onto the stamp using a foam brush and then pressed it onto my fabric.  It took a number of tries to figure out what the right amount of glue was.

Fabric stamped with glue
The glue looks a lot like Elmer's School Glue in that it's white and dries clear.  It's difficult to see it on the fabric when it's wet and pretty much impossible when it's dry.  You have to let your glue dry completely before moving on to the next step.  I waited overnight on these pieces.

Step 2 is the actual foiling process.  You lay the foil over the glue and then burnish it with a back and forth motion using a hot, dry iron.  This step involves a little bit of elbow grease to get the foil to adhere well.  After it's cooled, you can peel back the foil and see what's happened.  If it didn't stick well enough, no biggie, just put it back down and try again.  The foil will only stick where the glue is and you can even try to apply multiply layers or colors.

Applying blue foil to my fabric
I didn't have quite enough of the blue foil, so I had to keep repositioning it to cover my fabric.  I ended up 'decorating' 3 pieces of fabric.  I finally decided to use this fabric for a paper-piecing project.  I got my pattern from Carol Doak's Mariner's Compass Stars book.  I made #23, Sweden.

Fabric cut out and ready for paper piecing
I pieced the star block and added a border to make it a little larger.  The whole piece finishes at 17" square.

Star Bright - 17" Square
I'll admit that until I completed the block, I never thought I'd use this technique again.  It wasn't a lot of fun and was kind of messy.  But once I saw the block, I changed my mind.  Granted, it's not something I'll do frequently, but it's a great effect and I could see using it again some day.

Star Bright
At first I was just going to stitch in the ditch to quilt this.  But then I considered what a great opportunity it was to practice some free motion quilting.  I traced the basic shape of the quilt onto some Golden Thread's Quilting Paper and started doodling...

Ideas for quilting
I didn't follow the drawing exactly when I quilted it, but it gave me a good idea of what I wanted to do.  It easily took me as long to quilt this small quilt than it did to piece it!

Back of Star Bright
In the end, I'm glad I put the extra time into the quilting.  It adds a lot more to the piece than just stitching in the ditch would have.

Close up of quilting
Here are the stats for this small quilt:
  • Size: 17" square
  • Fabrics: Mostly batiks - from stash
  • Batting: Warm &White
  • Thread: Aurifil (piecing), Bunch of different ones for quilting
  • Pattern: Sweden from Mariner's Compass Stars by Carol Doak
  • Quilting: Custom
  • Started: May 2011
  • Completed: June 2011
  • Recipient: Lynn - The Twelve of Us
Now on to the next project - which happens to be a Stained Glass quilt.  I've actually been really interested in trying this.  I'll have to put my thinking cap back on to come up with an idea though.

Until later...

It is in Christ that we find out who we are and what we are living for … part of the overall purpose he is working out in everything and everyone.”  
Ephesians 1:11 (MSG)

Saturday, June 25, 2011

Stash Report Week #25 (It's a Doozy!)

June 18 - 24, 2011

Wow!  This may be my largest stash report ever.  At least I hope it is.  I would hate to think I've bought this much fabric in one week before!  But as it was all on sale and fabric I needed for various projects, I consider myself fortunate to have gotten it.  In particular, I already had a FQ Tower and Jelly Rolls of Park Avenue and Martinique fabric respectively, but nothing to go with them for borders, backing, etc.  These lines are fairly old and I thought I was out of luck.  So when I saw that Fat Quarter Shop was having a 40% off sale on these lines, I jumped at the chance to get the rest of what I needed.

Let's start with Martinique by 3 Sisters...  I already had 2 Jelly Rolls of this line.  I have several quilt ideas in line for it and plan to make a large lap/twin size quilt.  So I bought a yard of the pink and 8 yards of the coral to use for borders and backing.  (I would have bought more of the light pink, but they sold out of the rest of it before I finalized my purchase.)

Martinique Shell Hibiscus and Coral Sprig Yardage
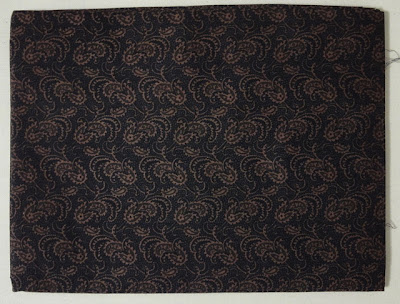
They also had a brown paisley on sale that I thought would work well for my Winter Wonderland quilt.  It was 50% off.  The stars in the border of this quilt are scrappy, so I didn't need a lot of it.

Adelaide Brown Paisley on Black
Now for my major purchase.  It was all fabric from the Park Avenue line - again by 3 Sisters.  Boy, those sisters sure do design some gorgeous fabric.  I already have a Fat Quarter Tower and 2 Charm Packs of this.  I'm planning on making a king-size quilt, wall hanging and lap throw out of it for my bedroom.  Hopefully I bought enough!  To start, I bought a  half yard of the Bella Ivory Solid.  (This was actually to see how well it works as a background for another quilt.  It does, so now I'll order the right amount.)  Below that is 2 yards of Park Avenue Mahogany Onassis Aster and 6 yards of Park Avenue Shadow Crowne Plaza.

Bella Solid Ivory and some of the Park Avenue fabric
Then in this next picture is the rest of the Park Avenue fabric.  From the top is: 1.5 yards of Limestone and Red Onassis Aster; 1 yard of Mahogany Onassis Aster; 2.5 yards of Lexington Blue Bryant Park; 10 yards of Lexington Blue Central Park; and 9 yards of Lexington Blue Bouvier Moire.

Lots more Park Avenue
As I said, that's a lot of fabric.  I also bought the pattern for the quilt I want to make using most of this fabric.  It's Wild Air by Miss Rosie's Quilt Company.  Did you know that Miss Rosie is actually Carrie Nelson's dog?  She's a beautiful girl.

Wild Air by Miss Rosie's Quilt Company
I'm going to adapt the pattern to work for the size I want.  Each of the zillion flying geese in this pattern finish at 1" x 2".  I might be insane to make it, but I think it'll be beautiful once it's done.

Although they don't compare in scope, I do have some small finishes this week as well.  I've completed another project for The Twelve of Us and mailed it off.  I'll share pictures once she receives it.  It used 2 yards of fabric plus I sent her another yard of FQ's with it.  My giveaway ended and between the 2 prizes, that's another 3.25 yards.

So...
Purchased-this-week: 42 yards
Used-this-week: 6.25 yards
Purchased-to-date: 182 yards
Used-to-date: 84.75 yards
Net used: -97.25 yards

By the way, I've already washed and pressed all of the new fabric!  I don't iron clothes, but I really do enjoy ironing yardage.  Strange.  I've also got another quilt loaded on the frame.  It will be for charity once it's done.  And I've almost completed piecing all of the blocks for another quilt that I've yet to share with you.  This has been a very busy couple of weeks quilting wise.  I hope you're having as much fun as I am!

Until later...

Always be joyful. Never stop praying. 
1 Thessalonians 5:16-17 (NLT)

Friday, June 24, 2011

Winners!

Just a quick post to announce the winners of the giveaway...

The winner of the Herds of Turtles quilt kit is Butterfly!


And the winner of the Fat Quarter Bundle is Catswhiskers!  (This was by far the most popular prize choice.)


Winners - you have 5 days to send me you addresses so I can get your prize in the mail for you.  But if I don't hear from you before then, I'll draw another name.

Thanks to everyone that entered and thanks even more for all the new friendships!

Until later...

As iron sharpens iron, so a friend sharpens a friend. 
Proverbs 27:17 (NLT)

Thursday, June 23, 2011

Signature Quilts...

Note - If you haven't entered my giveaway yet, you still have time. I'm drawing 2 names Friday morning. To enter, just leave a comment on this post

The ladies in my quilt bee have decided to make signature quilts.  Although several have made them in the past, this is something I've not tried before.  However, I really like the idea of a memory quilt with each of their signatures.  So I offered to put together a sampling of blocks we could use for these quilts.  There are so many different quilt blocks that lend themselves to this.  In fact, any block with a large open space will work.

I made 8 variations of blocks and designed some simple quilts in EQ7 to give them some ideas for their own quilts.  I also tried to concentrate on adapting these blocks to use pre-cuts (charm packs, layer cakes and jelly rolls).  And since I've already done all the work, why not share them with you as well?  If you're considering making a signature quilt yourself, perhaps it will spark some creativity of your own.

1.  Probably the easiest block for a signature quilt is the Rail Fence.  I made 3 variations - all of them making use of 2.5" strips.

6" Rail Fence Block using 3 - 2.5" x 6.5" strips
10" Rail Fence Block using 5 - 2.5" x 10.5" strips
12" Rail Fence Block using 4 - 2.5" x 12.5" strips and 1 - 4.5" x 12.5" strip
I also made a couple of sample blocks and quilts in EQ7 using the first two sizes.  Here's the 6" version block and quilt...

6" Rail Fence Block in Buttercup Fabrics
Sample quilt using the 16 of the 6" Rail Fence Blocks.  Quilt is 32" square.
And here's a 10" version of the block and quilt - again using the same fabrics.

10" Rail Fence Block using Buttercup Fabrics
Sample quilt using the 10" Rail Fence Block.  Quilt is 50" square.
2.  Another really simple block to make is called Diamond in the Square or Square in a Square.  Here's my version from scrap fabric.  You can make this block using charm squares for the corners.

6" Diamond in the Square Block
And here's a scrappy version designed in EQ7 using Rural Jardin...

6" Diamond in the Square Block using Rural Jardin Fabric
And here's a simple quilt using this block.  There are 16 blocks here plus inner and outer borders.

Sample Quilt using the 6" Diamond in the Square block.  Quilt is 32" square.
3.  Another simple option is the Simple Autograph block.  My sample version is also 6" square and can again be made using charm squares for the corners.

6" Simple Autograph Block using scrap fabric.
Here are the sample block and quilt from EQ7 using Awesome by Sandy Gervais.

6" Simple Autograph Block using Awesome fabric.
Again this quilt uses 16 of these blocks as well as an inner and outer border.

Sample quilt using the 6" Simple Autograph block.  Quilt is 32" square.
4. The next block goes by a couple of names - Churn Dash and Double Monkey Wrench.  I made a 12" version of this one.  This block can be made using 2 - 10" squares.

12" Churn Dash Block
I used the Wiscasset line of fabric when I designed the quilt and block in EQ7.

12" Double Monkey Wrench Block using Wiscasset
The quilt has 16 blocks and is the only one I designed with a sashing.  This quilt is 63.5" square.

Sample quilt using the 12" Double Monkey Wrench block.  Quilt is 63.5" square.
5.  Another fairly simple block you can use is the Variable Star.  My version is 12" square and can again be made using 2 - 10" squares of fabric.

12" Variable Star Block using scrap fabric
I used Cherish fabric when I designed the block and quilt in EQ7.

12" Variable Star Block using Cherish fabric
This quilt also contains 16 blocks, inner and outer borders.  It is 59" square.

Sample quilt using the Variable Star block and Cherish fabrics.
6.  The last block I made up is the Snowball block.  My version is 9" and again can be made using charm squares for the corners.

9" Snowball Block using scrap fabrics
In my opinion, just using this block in a quilt makes for a pretty boring quilt.  However, when paired with another block (not sure of the name), you get the Tennessee Waltz pattern.  This sample quilt is 55" square.

Tennessee Waltz quilt using 9" Snowball blocks.
These are really just a few of the blocks you can use to make a signature quilt for yourself or someone else.  There are so many more available if you just  look for them.  In fact, after putting all of these samples together, I'm not using any of them for my quilt.  I've picked something completely different.  However, this post is long enough so I'll wait until another time to share it!

Until later...

Fools think their own way is right, but the wise listen to others.  
Proverbs 12:15 (NLT)

Wednesday, June 22, 2011

The Book Depository - a review...

Disclaimer:  This is not a paid advertisement.  These people have no idea who I am!  I'm just pleased with their prices and service.

One of the things I love about reading other people's blogs is hearing about new (to me) websites and businesses.  Places with great customer service and good prices.  In an effort to pay it forward, I thought I'd share one of my favorites with you.  Just in case you haven't heard of it before.  It's called The Book Depository.  I can't remember the first time I ordered from them, but I've been pleased with their service and prices every time.  Here's just one example...

Several months ago I was in a quilt store when one of the customers brought in a quilt with her.  I don't know if she was shopping for a backing or just wanted to show it off.  As it was jaw droppingly gorgeous, I don't blame her if she just wanted to brag a little.  She also had the book the pattern came from with her.  It was called Quilt's from Grandmother's Garden by Jaynette Huff.  This lady had made the quilt from the cover.

She warned all of us that she thought the book was out of print.  When I got home, I searched for it online but couldn't find a copy.  I also looked at The Book Depository.  Although it wasn't there either, I was able to request that they notify me when it was back in stock.  Then I forgot about it until earlier this month when they emailed me to say they had several more copies.  Not only had they gotten it back in, but they didn't charge me full price for it either.  On top of that, there is never a charge for shipping and they ship worldwide.  Yep, you heard me right, they ship all of their books worldwide for FREE - all the time!

The book came today and I'm pleased as punch with it.  I'm adding the cover quilt to my list of quilts to make one day.  As you can imagine, that's a very, very, very long list already.

So let me sum up my review of The Book Depository...

Pros:
  • A large selection of books
  • Most of them are priced less than the cover price
  • Free shipping worldwide
  • Great customer service
  • The Book Depository Live - You can see what books other people are buying all over the world, but don't worry, it's anonymous!
Cons:
  • It will take a little while for the book to come.  It took 18 days for this latest one to come, but considering how little I paid for it, I didn't mind.  Besides, I think they're located in the United Kindgom!
So the next time you're looking for a book, quilting or otherwise, you might want to take a gander at this site.  Oh, and if you have any other sites that you just love, feel free to share them with me!

Also, if you haven't entered my giveaway yet, you still have time.  Just leave a comment on this post 

Until later...

Joyful are people of integrity, who follow the instructions of the Lord. 
Psalms 119:1 (NLT)

Tuesday, June 21, 2011

Sewing together...

Just a reminder - I can't respond to comments right now.  Once I return home, I'll be able to send email again.

Also, if you haven't entered my giveaway yet, you still have time.  Just leave a comment on this post

One of my plans for this trip to visit my family was to spend some time sewing with  my mom.  We both started embroidering the blocks for a Winter Wonderland quilt last fall and finished earlier this year.  But this is the first chance we've had to get together to move forward on it.  All of our blocks still needed to be cut down to the right size and we had hoped to get the center of our quilts assembled.  Everything went well cutting the blocks and before long, my mom had hers put together...

Robbie and Mom holding up her top
However, when I laid out my blocks in order, I noticed a problem.

My Winter Wonderland  Blocks
I was bothered by the one block that's so much darker than the rest.  My mom tried to convince me it was OK, but when my dad came in, he pointed it right out!  I knew I wouldn't be happy if I didn't change it, so I pulled out some more material and traced another one.

New Snow Angel Block
Fortunately for me, this is the smallest embroidery in this quilt.  It only took me an evening to embroider another one.  But once I laid them side by side, I'm still not convinced it's going to work.  When I traced it out, the new fabric looked so much lighter than the other.  Now with them laying side by side, I'm not seeing that much difference.

Old and New Snow Angel Embroideries
I'm going to wait until I return home, lay them all out again and then decide if I'm going to make a 3rd version.  I also discovered I don't have enough fabric for the inner border so it doesn't do me any good to assemble the blocks until I have that.  I suppose that means another shopping trip when I return!

While I worked on my embroidery, my mom got started on the Fly Stitching that goes between each block.  It didn't take her long to finish one of the rows and start on another...

Moms adding the Fly Stitch on her quilt
I so enjoy spending the time sewing with my mom and when she retires (hopefully soon), I plan for us to do a lot more of it.

My dad bought Gabriel another new baby today.  She already has one she's been playing with, but if one is good, then two must be better, right?

Gabriel and her new baby
Until later...

Because of the Lord’s great love we are not consumed, for his compassions never fail. They are new every morning; great is your faithfulness. 
 Lamentations 3:22–23 (NIV)

Monday, June 20, 2011

Star Crossed done...

So last week, I finished not one, but two quilts.  That might be a first for me.  Hmmm, I wonder if I could ever complete 3 in one week?  Perhaps if I gave up everything else that week - including sleep!

Star Crossed is a Twister quilt, meaning I used the special Twister template to make it.  For the smaller version, you start by sewing some 5" squares together and adding a 3" border.

Initial Twister Quilt
Then you use the special template and cut your blocks from your initial topper.

In the middle of cutting out the Twister blocks
Sew them back together, add your borders and you're done!

Star Crossed
This is a small quilt (37" square) and only took an hour and a half to quilt on the frame.  I used the Hedge Pantograph by Meridith England.  I've used this pantograph before but had some trouble with my stitch length this time.  The machine would tend to stutter at a certain point on each pass.  Nevertheless, I managed to work through it.  Here's the back of the quilt showing the panto...

Back of Star Crossed
This quilt will hang in my sewing room after I finish repainting it.

Here are the stats for this quilt:
  • Size: 37" square
  • Fabrics: Mary Jo's Cloth Store and Quilts Like Crazy
  • Batting: Warm &White
  • Thread: Aurifil (piecing), Superior Threads #425 (quilting)
  • Pattern: Twister
  • Quilting: Hedge Pantograph (10 passes and 2 bobbins) (1.5 hours quilting time)
  • Started: May 2011
  • Completed: June 2011
  • Recipient: I'm keeping this one!
Until later...

We put our hope in the Lord. He is our help and our shield. 
Psalm 33:20 (NLT)

Sunday, June 19, 2011

Man Cave done...

I've finally finished a quilt for Mr. Quilting Bug!  I made this quilt for him to use during those cold winter nights. Luckily I finished it just in time for - summer.  What timing on my part.  Oh well, it'll be ready for him when the weather changes in another 6 months!

Man Cave
Although I can't claim this for every quilt, I know pretty much all the stats for this one.  I bought the fabrics for it and cut it out in November of 2009.  The center of the quilt is made from a 2.5" batik strip roll I bought from Love 2 Quilt in Williamsburg, Va.  It languished on my shelf until another quilting retreat the following November where I turned it into a flimsy.  I loaded the quilt on the frame back in March of this year but only finished quilting it last week.  What can I say, I was in a bit of a slump for a while.

I quilted it using a new (to me) pantograph called Square Spirals by Keryn Emmerson.

Square Spirals Pantograph
I really love the look of the pantograph on this quilt and I'll definitely be using it again in the future.  I took a picture on my last pass quilting so you can better see the pattern...

Square Spirals Pantograph on Man Cave
I had to do one thing different with this quilt on my frame and I wanted to share it with you in case you ever run into the same issue.  I usually load my quilts sideways because they quilt quicker that way.  However, I couldn't do that this time because I wanted the pantograph to go horizontally across the quilt.  I had already prepared the backing to load it the other way and found that I had very little fabric left on either edge once it was on.  I can't remember where I heard this but someone once suggested pinning an additional piece of fabric to the edges to give you that extra room for your machine.  It adds an extra step, but was totally worth it.  If I hadn't pinned the canvas to either side, my machine would have kept bumping into the clamps that hold it there.  Hopefully this picture will make things clearer.  My first choice is always to cut the backing/batting large enough to give me this clearance, but this is a quick fix if it isn't.

Temporary side leader added to the quilt
Here are the stats for this quilt:
  • Size: 63" x 71"
  • Fabrics: Top and binding from Love 2 Quilt, backing from JoAnns
  • Batting: Warm & Natural
  • Thread: Aurifil (piecing), Superior Threads #425 (quilting)
  • Pattern: Bali Boxes (out of print) - I made slight changes to the pattern
  • Quilting: Square Spirals Pantograph (30 passes and 5 bobbins) (7.5 hours quilting time)
  • Started: November 2009
  • Completed: June 2011
  • Recipient: Mr. Quilting Bug

Just a reminder that you can still enter my giveaway by leaving a comment on this post.

Until later...

Let us hold tightly without wavering to the hope we affirm, for God can be trusted to keep his promise. 
Hebrews 10:23 (NLT)