Showing posts with label Crazy Quilting. Show all posts

Tuesday, October 12, 2010

Final CQ Update...

Yes, I've finally finished the CQ block.  I expect this will be my last post concerning crazy quilting for quite some time.  It is a labor and time intensive hobby that a lot of people are 'crazy' about.  After having tried it, I can report that I don't think I'm one of them.  I much prefer to admire other people's efforts.  Here is the block with all the patches and seams completed...

Finished CQ block

As I mentioned before, I intended to added some Hyacinths to the final block.  These flowers are made using a bunch of Looped Ribbon stitches with 4mm silk ribbon.  The stems are Twisted Straight stitches and the leaves are a combination of Ribbon stitches and Folded Ribbon stitches.  Both the leaves and stems were made with 7mm silk ribbon in shades of green.

Patch #11 - Dutch Hyacinths and caterpillar

All that was left was to finish the edges and put a backing on it.  I wasn't certain how to go about it.  It's a pretty heavy block with all the beads, charms and ribbon.  I have a friend who has had several of her pieces framed.  I thought that was a good idea but couldn't find a frame that would work with these dimensions.  The block finished at 11.25" square.

So I asked Mr. Quilting Bug to cut me a thin piece of wood 12" square.  I added a border to the block out of a green velvet.  I stitched a backing to 3 sides, turned it right side out and inserted the piece of wood.  I then hand stitched the opening closed.  If Elaine would like to do something different with it, she can easily remove the wood.  Or she can hang the finished piece on a wall or set it on a stand.  Whatever she fancies.

Finished CQ block

Some lessons learned -

1. CQ is not a cheap hobby and (for me) it takes up a lot of space.  Mr. Quilting Bug has put up with quite a bit of clutter in the living room for the past month or so while I worked on this.  There are books, ribbons, charms, beads, needles, thread and other assorted paraphernalia. 
2.  You can create some very lifelike flora and fauna using silk ribbon.  There were several techniques I had always wanted to try and making this block gave me the chance to do so.
3.  This is not a good stash busting hobby.  Although you have the opportunity to buy a bunch of different embellishments, you don't need a lot of fabric.  And I find that I really like fabric and lots of it.

So while I enjoyed myself and learned a lot, this is unlikely to turn into a passion of mine.  But every time I see a crazy quilt in a quilt show now, I'm going to have a much better appreciation of the time and effort involved in making one.

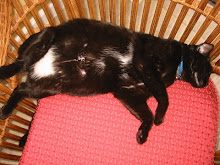
Another picture of Jack.  Lately she's taken to rushing the camera when she sees it.


Until later...

"If you wait for perfect conditions, you'll never get anything done!" 
Ecclesiastes 11:4 (LB)

Thursday, October 7, 2010

CQ Update #8...

I'm almost done now! Tonight I finished all but the last of the patches on this block.  If I didn't have such a bad headache, I might have continued working on it.  There's something about seeing the finish line that gives you an extra burst of speed.  In any case, I plan to make Hyacinths on the last patch and expect them to take a bit of time.  So here's the block as it stands right now...

Current progress on the CQ block

To my eye, it's looking rather busy.  But I've noticed that with a lot of the crazy quilts I've seen.  Every time you look at it, you see something new.  And the more you examine them, the more you appreciate all the work that goes into each one.  After working on this small 12" block for so long, I have a huge admiration for anyone who has made an entire quilt like this.  I think it's a bit beyond my level of patience.

I've finished 2 more patches since my last report.  Patch # 9 is another row of flowers.  I found some purple iridescent shells at JoAnns the other day that are shaped like flowers.  I attached them to the background and added stems to each of them using the Stem stitch and 3 strands of DMC floss.  The leaves are a combination of Ribbon sitches, Folded Ribbon stitches and Straight stitches using 4mm green silk ribbon.  And finally I added a butterfly charm above the flowers.

Patch #9 - more flowers

For the next patch, I used some ribbon flowers that I also purchased from JoAnns.  I stitched them on and added a Whipped Chain stitch for the stems using 2 strands of DMC floss.  I found the beads for the leaves in my stash of jewelry stuff.  The little bug charms I added were given to me by my friend, Thearica.  I really like the touch of whimsy they add to the patch.

Patch #10 - Red flowers and bugs

I'm so glad Thearica suggested I stitch all the seam treatments before embellishing the patches.  It would have been much more difficult to go back at the end and add them.

I've been wanting to stitch a caterpillar somewhere on this block and found the perfect place for him tonight.  I've placed him climbing from one seam to another in the last unfinished patch of the block.  He's constructed of a bunch of Colonial Knots placed close together using 4mm yellow/gold silk ribbon.  I then went back and added straight stitches between each pair of knots using 2 strands of DMC floss.  Although it doesn't show well in the picture, I also added a couple of Straight stitches for antennae.

Patch #11 - The caterpillar

Hopefully I'll get started on filling in the last patch tomorrow.  Once it's finished, I still need to put a backing on the block before calling this challenge piece complete.  

Until later...

"Many are the plans in a man's heart, but it is the Lord's purpose that prevails."  
Proverbs 19:21 (NIV)

Monday, October 4, 2010

CQ Update #7...

OK, I'm back with another update on my CQ block.  By now you must be wondering if I'll ever finish this thing, so I'll reassure that I'm actually getting close.  I finished the rose bushes (I think) and 2 more patches besides.  Here's where the block stands right now...

CQ Block in progress

I only have another 3 patches to fill.  Since my last update, I added a bunch more roses to the fence in the bottom right hand corner.  These are Spider Web Roses made using 4mm and 7mm silk ribbon in shades of red.  I'm considering adding some greenery around them and perhaps even a few more Roses, but I'll wait until I've finished everything else before deciding.  I did add a few charms around the Roses - 2 bee charms to the top and a bunny charm to the bottom.

Patch #6 - Spider Web Roses and bunny

For patch #7, I added a Chrysanthemum in shades of purple.  It was really easy to stitch.  I just made lots of Straight stitches and Twisted Straight stitches using 4mm silk ribbon.  I then added a bunch of Colonial Knots to the center using 4mm silk ribbon in 2 shades of yellow/gold.  The stem is a Whipped Chain stitch using 3 strands of DMC floss in 2 shades of green.  The leaves are a Fly stitch again using DMC floss.  I then added a snail charm beside it.

Patch #7 - Chrysanthemum and snail

And the last patch I completed is a Spyder Chrysanthemum using 2mm and 4mm white silk ribbon.  These are the same stitches as the Chrysanthemum in patch #7 but in a slightly different arrangement.  The center of the flower is Colonial Knots made with a 4mm yellow silk ribbon.  The stem is made using a Stem stitch and 3 strands of DMC floss.  The leaves are made using the Fly stitch and 4mm green silk ribbon.  The buds off to the side are Twisted Straight stitches in 2mm white and Ribbon stitches in 4mm green silk ribbon.  Finally, I added a butterfly charm to one side.

Patch #8 - Spyder Chrysanthemum and butterfly

I bought a couple of buttons and ribbons at JoAnn's today that I plan to use on a couple of the remaining patches.  And if all goes well, I'm going to attempt some Hyacinth's in the last patch.

Jack has taken up a new favorite spot at night in the living room.  I think she just likes to sit across from Mr. Quilting Bug and stare at him.  I don't blame her, sometimes that's all I want to do too.

Jack just hanging out

Until later...

"Now that you know these things, you will be blessed if you do them." 
John 13:17

Thursday, September 30, 2010

CQ Update #6...

As a reminder, I wrote this post before I left for my quilting retreat so I'm hoping I have a lot more done than this.  But here's my current progress on the never ending Crazy Quilt block.
Crazy Quilt Block

I'm now working on the fence in the lower right hand corner.  I know I want to put lots and lots of roses all over the fence so I started by adding the base of the rose bushes using 3 strands of DMC floss and a stem stitch.  I then added half a dozen roses, but didn't like the look of them.  So I took them all out.  I added more branches in another color of floss and started over with my roses.  I have 3 done so far and this is how it looks...

Patch #6 - Rose bushes

Each rose is made using silk ribbon in either 4mm or 7mm and using the Spider Web Rose stitch.  I'm liking the look of this much better than before.  I'll continue to add at least another dozen roses in several shades of red silk ribbon.  And then I have plans to add a couple of charms to it as well.  Hopefully when I return from the retreat I'll have finished this patch and moved on to the Hydrangeas.

Until later...

When people sin, you should forgive and comfort them, so they won’t give up in despair. 
2 Corinthians 2:7 (CEV)

Tuesday, September 21, 2010

CQ Update #5...

Not a lot of progress on this the last couple of days.  Too many other things have required most of my time.  So here's where the block stands now...

Crazy Quilt Block

The only difference from my last update is the patch in the upper left hand corner.  It's a patch of violets.  I made the flowers using 4mm variegated purple silk ribbon and a Ribbon stitch.  The center of the violets are Colonial Knots using 4mm yellow silk ribbon.  After I stitched a bunch of the flowers in various sizes, I went back and added leaves using the Detached Chain stitch and Ribbon stitch with 4mm green silk ribbon.

Block #5 - Patch of Violets

After adding what seemed to be hundreds of leaves, I realized they were covering up too much of the petals and making them appear flat.  So I went back and added additional petals on top of the others to make them stand out more.

I'm practicing my Spider Web Rose tonight because I want to add a bunch of them to the fence in the bottom right hand corner.  I expect that patch will take a little longer to complete than some of the others.  If you remember, my deadline for this block was supposed to be September 22nd (or tomorrow).  Obviously that's just not going to happen, but Elaine has been very understanding about the delay.  I'd rather take a little longer and put my best effort into it then slap something together just to call it done.  Although I only have 6 more patches to complete, so it shouldn't be too much longer...

Until later...


"I have not departed from the commands of his lips; I have treasured the words of his mouth more than my daily bread." 
Job 23:12 (NIV)

Sunday, September 19, 2010

CQ Update #4...

Now that the seams are all done, I can concentrate fully on the individual patches.  I know what I'd like to do for most of them.  Or let me rephrase that, I know what I hope to do for most of them.  Here's my progress so far...

Crazy Quilt Block

You can see in the upper left that I've added a tulip patch.  I got the idea (and instructions) from the Ribbon Embroidery & Stumpwork book by Di Van Niekerk.  She has a lot of great ideas in that book!  Here's a closeup of the tulips...

Block #4 - Tulip Patch

I stitched down oval beads for each tulip and then covered them with Ribbon stitches using 7mm persimmon silk ribbon.  The stems are Twisted Straight stitches using 4mm green silk ribbon.  I made a Grab stitch at the base of each Tulip before making the stems.  And the leaves are Twisted Ribbon stitches using 7mm wide ribbon.  The Tulips were really pretty easy to make.  And I added a Bee charm to the patch as well.

I'm spending the day tomorrow with a friend where I'll be working on this, so I hope to make a lot of progress on it.  I've already started on a patch of violets that I hope to finish.

This is a my sister's dog Abby.  She's 12 and an American Dingo. She had a very itchy nose at the time.

Abby scratching her nose

Until later...


"And may you have the power to understand, as all God's people should, how wide, how long, how high, and how deep his love is. May you experience the love of Christ, though it is too great to understand fully"  
Ephesians 3:18-19 (NLT).

Saturday, September 18, 2010

CQ Update #3...

Still hard at work on this project.  I've finally managed to finish embellishing every seam on this small quilt block - all 13 of them.  And the silk ribbon I've been waiting on has also arrived so I have everything I need (I hope) to finish the rest of the blocks.

Before I share the last 8 seam treatments, here's a picture of the block as it currently stands.

CQ nature block

It's starting to look fuller now that the seams are done.  Next, I'll add a bunch of silk ribbon embroidery to the rest of the spaces.

For seam #6, I stitched a Chevron stitch using 2 strands of green DMC floss.  Then I added these pink flower beads to the bottom.

Seam #6 - Chevron stitch and flowers

For seam #7, I first added a back stitch with 2mm green silk ribbon and then wrapped it with a darker green ribbon.  But when it was done, I didn't think it had much pizazz, so I went back and added the beaded cluster to either side using a pink seed bead on top of 2 red ones on top of 3 green ones.  I think they look like little flowers.  I lost count of how many times I stuck myself with the beading needle on this one.  It was a tight space and I was all thumbs!

Seam #7 - Beaded flowers

For seam #8, I did a Looped Ribbon stitch down the whole seam and then added small seed beads between each loop.

Seam #8 - Looped Ribbon and beads

For seam #9, I was having trouble thinking of new things and found this piece of trim in my stash.  I simply stitched it down on both sides.

Seam #9 - green trim

For seam #10, I used 2 strands of light green DMC floss and stitched a Feather stitch.  I then went back and added seed beads to the tip of each feather.

Seam #10 - Feather stitch and beads

For seam #11, again I used 2 strands of pink DMC floss to make a bunch of Lazy Daisy stitches in a fan shape.  I also made a couple of Lazy Daisy flowers on the bottom row as well.  And I'm finding almost none of the seams are complete without yet more seed beads stitched on them.

Seam #11 - Lazy Daisy stitches and beads

For seam #12, I used 4mm yellow silk ribbon to make Cross stitches.  I then came back with a 4mm burgundy silk ribbon and made 2 Colonial Knots between each one.

Seam #12 - Cross stitches and Colonial Knots

For the final seam, #13, I used 3 strands of a light pink DMC floss and made 5 Straight stitches in a fan shape.  I then went back and added an iridescent seed bead to the tip of each spoke.

Seam #13 - Straight stitches and more beads

I learned a lot from stitching each of these seams and got the chance to practice some stitches I've never tried before - like the Colonial Knot.  I had some trouble initially figuring out how to stitch it, but now I find it easier than making French Knots.  The book I used as my design inspiration for most of the seams is "An Encyclopedia of Crazy Quilt Stitches and Motifs" by Linda Causee.  I highly recommend this book not only for ideas but also the how-to for each stitch.

So now I'm off to work on the rest of it, but first I'll leave you with a picture of David trying to sneak in the freezer once again...

David in the freezer

Until later...

"Command those who are rich in this present world not to be arrogant nor to put their hope in wealth, which is so uncertain, but to put their hope in God, who richly provides us with everything for our enjoyment" 
1 Timothy 6:17 (NIV).

Tuesday, September 14, 2010

CQ Update #2...

I'm making more progress on my crazy quilt block.  I decided to change direction a bit after getting some good advice from my friend Thearica.  She suggested I mix it up some and work on the seam embellishments (for several very good reasons). 

I'm grateful for the advice.  I'm finding it takes much less time to embellish a seam rather than a block.  I've already managed to finish 5 of the seams and have started on another.

CQ in progress

First, I stitched some butterflies using 2mm pink silk ribbon for the bodies.  Each butterfly is made up of 4 chain stitches - two on the top and two smaller ones on the bottom.  Then I added antennae using a straight stitch with metallic thread and sewed on beads for the tips.

 Seam #1 - butterflies

For the second seam I made a row of flowers using a buttonhole stitch for the stems and chain stitches for the leaves.  I used 2 mm green silk ribbon for the stitches and then added flower sequins and beads to the top of each stem.

Seam #2 - Flower bed

For the third seam, I used a fly stitch and 2 mm bright green silk ribbon.  I then sewed a bead to each tip.

 Seam #3 - Fly Stitch

The fourth seam was the time consuming just because I really wanted to make sure the roses were on there securely.  I used 2 mm light green silk ribbon for the cross stitches, rose charms in between the crosses and green beads where the silk ribbon intersected.  So far, it's my favorite one.

Seam #4 - Rose garden

And the final seam I've completed was a simple chain stitch using metallic thread.  It was definitely the quickest to stitch.

Seam #5 - Metallic chain stitch

Can anyone offer suggestions for taking better pictures of the stitches?   They're so small, I'm having trouble showing the details.

I've got jury duty tomorrow so I won't get anything done until that's through.  But I'm happy with my slow and steady progress on this block.  I'm still not sure yet if I'll make the deadline of Sept. 22nd, but I'm thinking it'll be pretty close.

I caught Sam napping on one of the many kitty magnets around here.

Sam on the binkie

All the cats seem to love this one.  The black feet in the picture belong to David.  They were playing nice today and sharing it.

David napping the day away

I've finally found an all natural diet cat food to try for Sam.  I'm hoping I get a few free moments to run by the pet store and pick her some up tomorrow.  Please say a prayer that it works for her!  The extra weight is just awful for her joints and I cringe every time I hear them pop.

Until later...


"Every good and perfect gift is from above, coming down from the Father who does not change like shifting shadows." 
 James 1:17 (NIV)

Sunday, September 12, 2010

CQ Update #1...

I've made some more progress on my Nature CQ quilt.  Last time I shared, I had just finished putting the background together and I was ready to start embellishing.  I'm now glad to report that I've added embellishments to 3 of the 11 blocks.

For the first blocks I decided to stitch an apple tree.  I started off with 6 lengths of 24 gauge wire and twisted them together.  I couched the wire down to the background in several places just so it was easier to work with.  Then using a total of 4 strands of DMC floss in 2 different shades of brown, I wrapped all of the wire to create my tree trunk.   It took me through most of the movies "A Dog's Breakfast" and "My Name is Bruce".  (Neither of which were my pick.)  And this is what I had when I went to bed last night...

Tree trunk for apple tree

I was eager to work on it some more today because I figured adding the apples and foliage would be a lot more fun.  And they were.  But both still took a considerable amount of time.  First I added the apples which are red beads I found at JoAnn's.  And then I added the leaves using 4mm silk ribbon in 2 different shades of green.  I used the detached chain stitch all around the apples.  And finally I secured a bird charm to the background.

Block 1 - Apple Tree

All together it probably took me around 5 hours to make and I have to say I'm pretty pleased with my first attempt. 

So then while watching episodes of "Bones", I started on another section.  (I don't know how I missed this series.  It's pretty good and Mr. Quilting Bug and I are going through and watching it from the beginning.)  I've heard that all CQ blocks are supposed to have a spider web and spider on them although I have no idea why.  I used a silver metallic thread to create my web.  It was a little hard to work with as it kept wanting to kink up, but it stitched up pretty quickly.  I used long straight stitches and then couched them in the middle to make them more stable.  Finally I added a spider charm to the web.

Block 2 - Spider and Spider Web

We were only part way through an episode of 'Bones" so I kept on working.  I wanted to do something simple and I decided to add a bee to the smallest block.  I have a book that details how to make one using silk ribbon and some very simple stitches.  The body and wings are ribbon stitches, the eyes are french knots and the stripes and tail loop are running stitches.

Block 3 - The Buzzing Bee

I've got to do some more thinking about the rest of the blocks now.  I know I want to add some roses, hydrangeas, a daisy and some tulips, but I need some more silk ribbon before I can start any of those.  As for the others, I have some rough ideas.  I need to flip through my books some more.  And I know once I've finished each of the blocks, I'll still need to go back and add some embroidery to each of the seams.

Here is a picture of the most recent litter of kittens at my parents.  Aren't kittens absolutely adorable?

Mama and her new kittens

I'd love to take the white one home with me, but I think my husband would divorce me.  He still has no idea how he's ended up with 4 cats and a dog.  It must be love.

Until later...


"Cast all your anxiety on Him, because He cares for you." 
1 Peter 5:7

Friday, September 10, 2010

Back in class...

I was always one of those kids who loved the start of the new school year.  I not only looked forward to seeing my friends, but I just really enjoyed learning.  One of the things I like most about quilting is that I'll never know it all.  There will always be something new to it - a new technique, a new notion, loads of new fabric, new patterns, new quilts, and on and on.  I can be a perpetual kid.

My latest learning curve is a small crazy quilt I'm working on.  It has to be 10-12 inches square and depict a nature theme.  This is my first ever crazy quilt and I can already see how a person could dedicate years (and lots of $) to this art.  I spent an inordinate amount time just deciding on a layout.  But last night, I finally finished putting the background together...

Crazy Quilt background

Thanks to a very generous friend for supplying me with the fabrics for this!  They're a combination of silks and damasks and velvets and other 'difficult' to work with fabrics.  She also gave me a selection of beads, charms and laces to use to embellish the patches.  (FYI - She has an online store where she sells some of these items.  It's http://coveryourlittlepiggies.com/.  Check it out!)

Now I've got to get started on embellishing it.  The deadline is coming more quickly than I'd like.  But this will be a great chance to finally do some silk ribbon embroidery.  I've been wanting to try it for years.  I'll share some progress pictures as I work on it.

On a different note, I won a giveaway from Spun Sugar Quilts when they were doing the blog tour for Barbara Cline's new book, Star Struck Quilts.  I didn't win the book (which I wanted) but I did win this little prize pack...

Prize pack

I so love getting packages in the mail!

Until later...

"My God shall supply all of your needs according to His riches in glory by Christ Jesus." 
Philippians 4:19 (NIV)